
DRAFT PREVIEW — this page is not linked anywhere and is hidden from search engines. The live instructions are still at /pages/rma-return.
RMA Return Packaging (Draft)
Follow these instructions to properly package your Gaming PC for safe return shipping!
First, tell us which case you have
Packaging steps are different depending on which case we built your system in. Pick yours and we'll show you only the steps that apply to your PC.
Materials You'll Need
- Your original inner case box and its packing materials
- Your original foam key inserts (the pre-cut foam that came inside the case)
- Your original outer shipping box
- Expanding foam packets (Instapak Quick Foam or similar)
- Bubble wrap
- Sturdy outer shipping box (2–3 inches larger than the PC on all sides)
- Packing tape (strong, wide tape recommended)
- RMA label and shipping documentation
Step-by-Step Packaging Instructions
Prepare Your PC
Before packaging, ensure your PC is properly prepared:
- Back up your data: Remove or securely backup any personal data. We recommend performing a factory reset if possible.
- Remove external devices: Disconnect all cables, peripherals, and any external components (monitors, keyboards, mice, USB devices).
- Clean the exterior: Wipe down the case to remove dust and debris.
- Take photos: Document the condition of your PC before packaging for your records.
⚠️ Important: Your RMA will be rejected if ANY Biohazard is present. This includes but is not limited to bugs, blood, random liquids, or other foreign substances. Please ensure your system is clean and free of any biohazards before shipping.
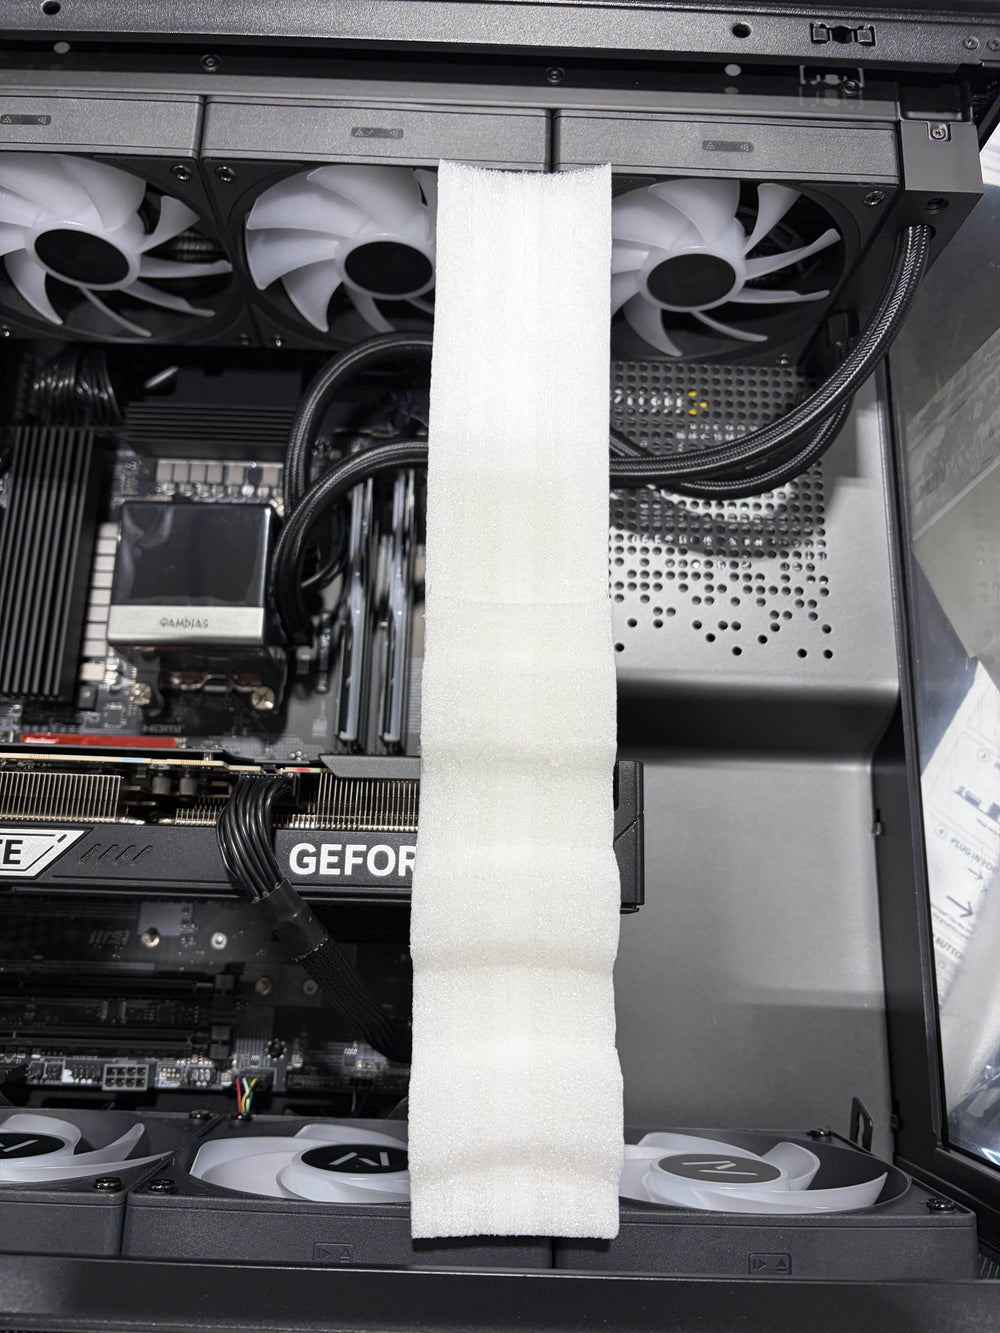
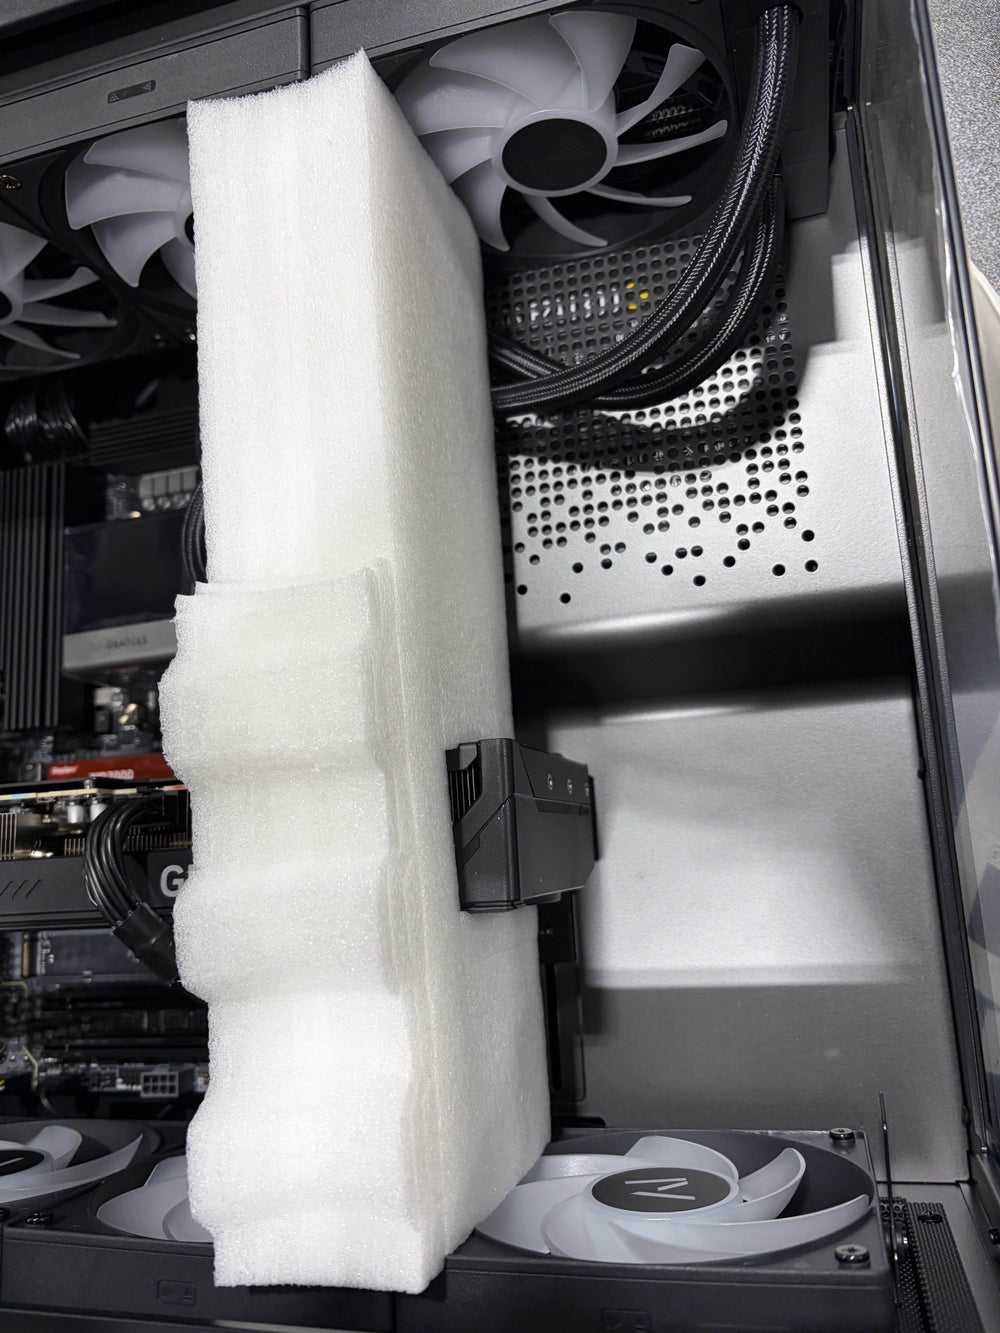
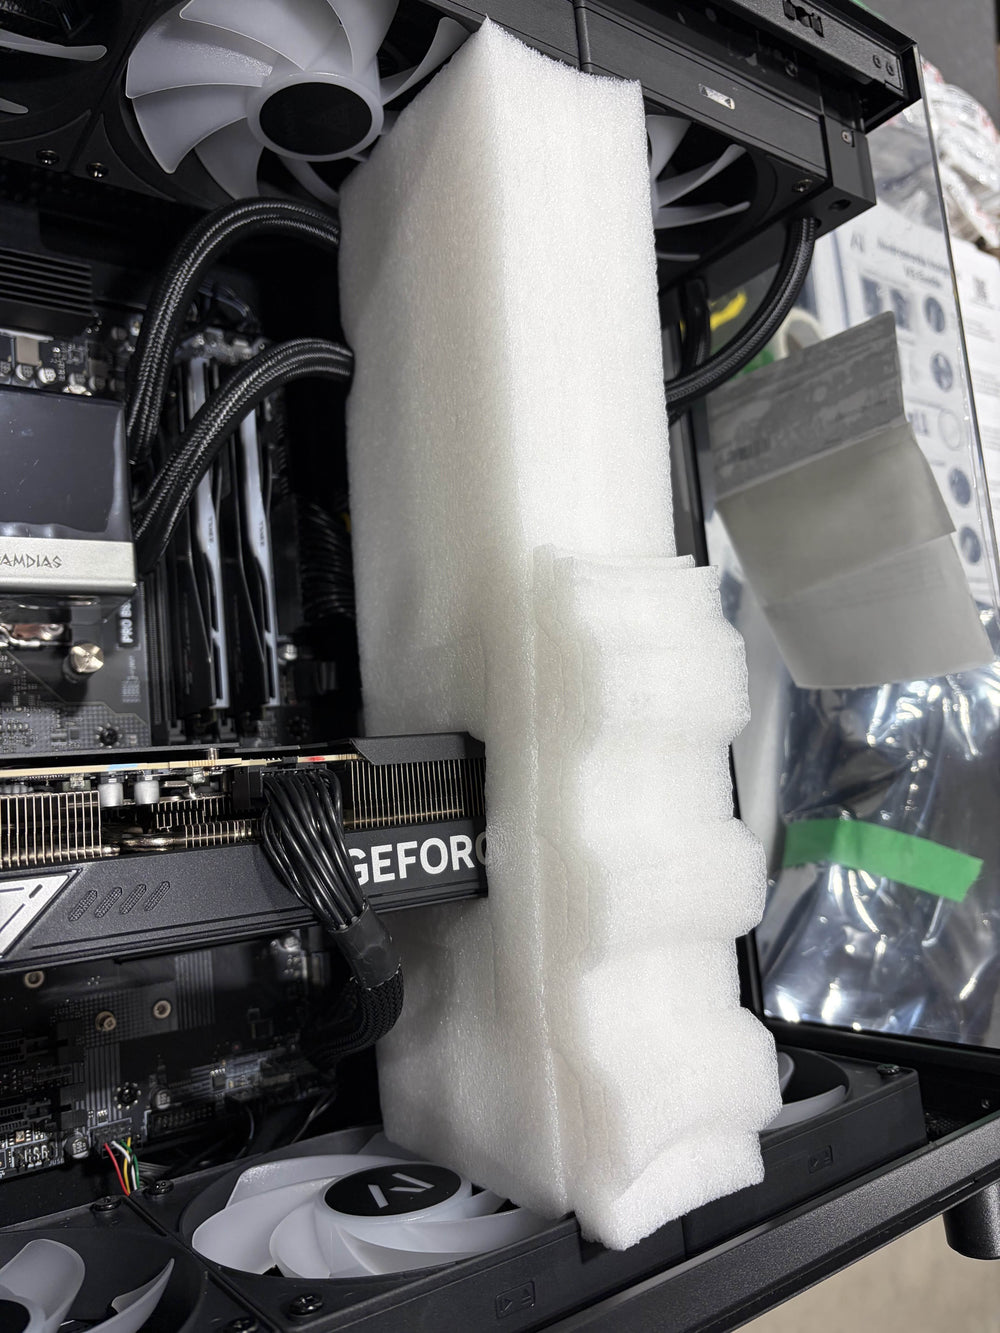
Secure the Internals with Your Foam Key
Your system shipped with a foam key — pre-cut foam inserts moulded for this exact chassis. There is no expanding foam to activate, which makes repacking a lot simpler.
- Open the side panel so you can reach the inside of the case.
- Refit the foam key exactly as it came out. The lower insert supports the graphics card from underneath; the upper insert fills the space between the card and the top of the case.
- Check the fit. The foam should sit flush and the graphics card should not be able to move or sag. Nothing should rattle if you gently tilt the case.
- Close and secure the side panel.
Because your case has its own moulded foam solution, you do not need expanding foam and you do not need to bubble wrap the system.
⚠️ If you no longer have your foam key, please contact us before shipping. Do not substitute loose packing material, towels, or clothing inside the case.
Secure the Internals with Expanding Foam
If you purchased a system return kit or sourced your own expanding foam packets, you will need to activate the packets in order to properly fill in the gaps underneath the hood of your system to protect the internal components during transit.
⚠️ Safety First: Please make sure to wear safety glasses, and perform all steps on a firm, flat surface.
To activate and use the expanding foam packets, please follow these steps:
- Set up the packet: Fully unfold the foam packet and lay it flat on a firm surface. Locate the activation zones at the bottom of the bag, commonly labeled as Component A and Component B.
- Jumpstart the reaction: Firmly press the designated “Press Here” area on Component A until you feel or hear the internal seal release.
Do not twist, squeeze, or aggressively manipulate the packet, as this may cause premature rupture and cause the foam to splatter over the internal components. - Combine the materials: Using steady pressure, alternate pressing between the A and B sections approximately 15–20 times to mix the contents. The packet will begin expanding shortly after activation, a "POP!" sound will be made as a result.
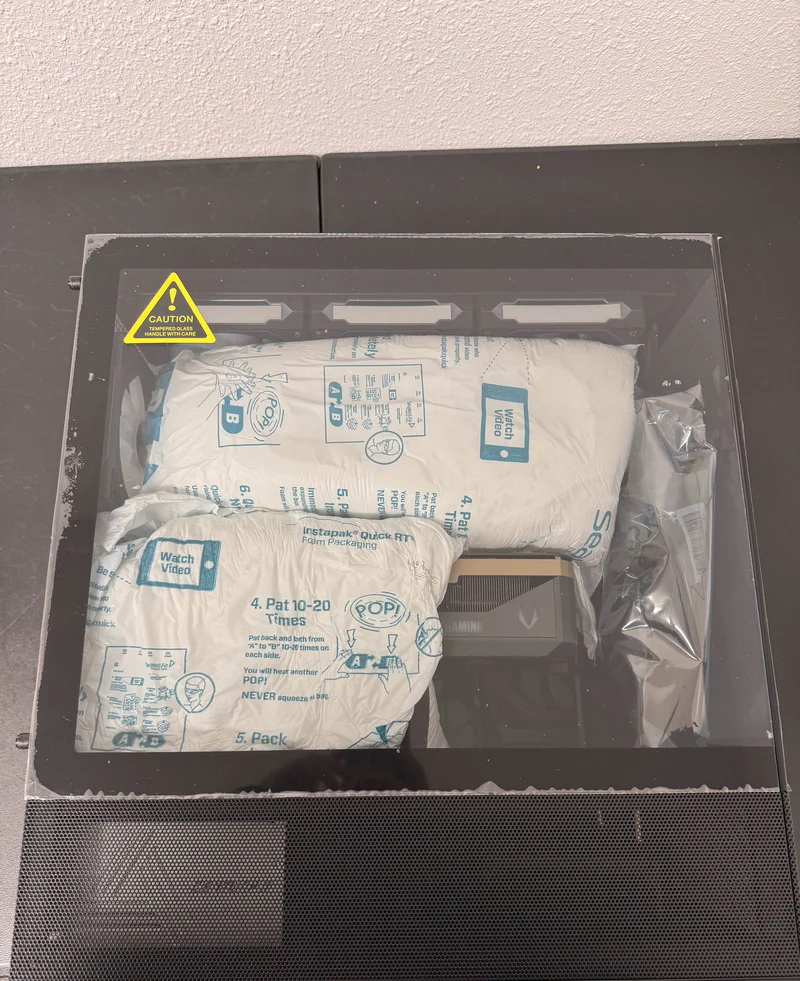
- Position the foam packet: Immediately place the expanding packet inside the case, resting it above the graphics card with the activation areas oriented between the GPU and the power supply shroud.
Close the tempered glass side panel to allow the foam to expand evenly within the enclosure.
⚠️ Important Safety Notes: During this step, the expanding foam will become very warm and release steam. Please do not attempt to "stuff" the expanding foam into the area below the GPU, as forcefully pressing the bag can cause it to implode and damage components inside of your system as a result. - Lastly: Let the system sit for at least 5 minutes with the glass side panel installed. If properly done, the expanding foam should have filled the area beneath the graphics card and wrapped around to the top of the card to provide a protective cushion all around.
Expansion precautions:
- The packet will become warm and may emit steam - this is completely normal
- Do not obstruct or touch the vented area of the bag
- Do not force the foam into tight gaps beneath the GPU, as excessive pressure may cause the packet to burst and damage internal components
Visual Reference: For a demonstration of using the expanding foam product, please check out the video linked below:
Repack Your Case Box
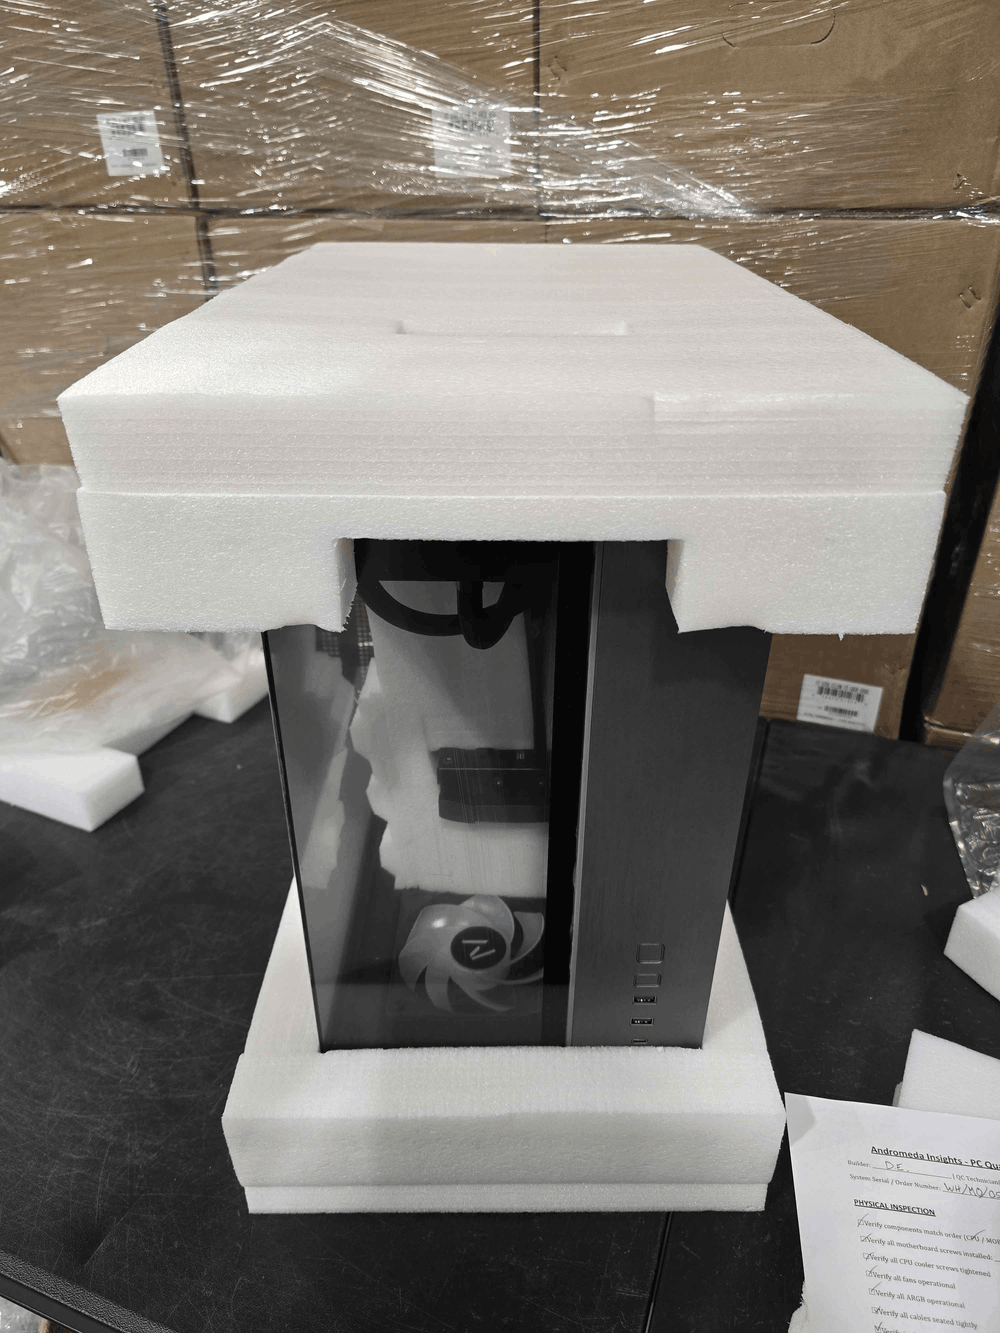
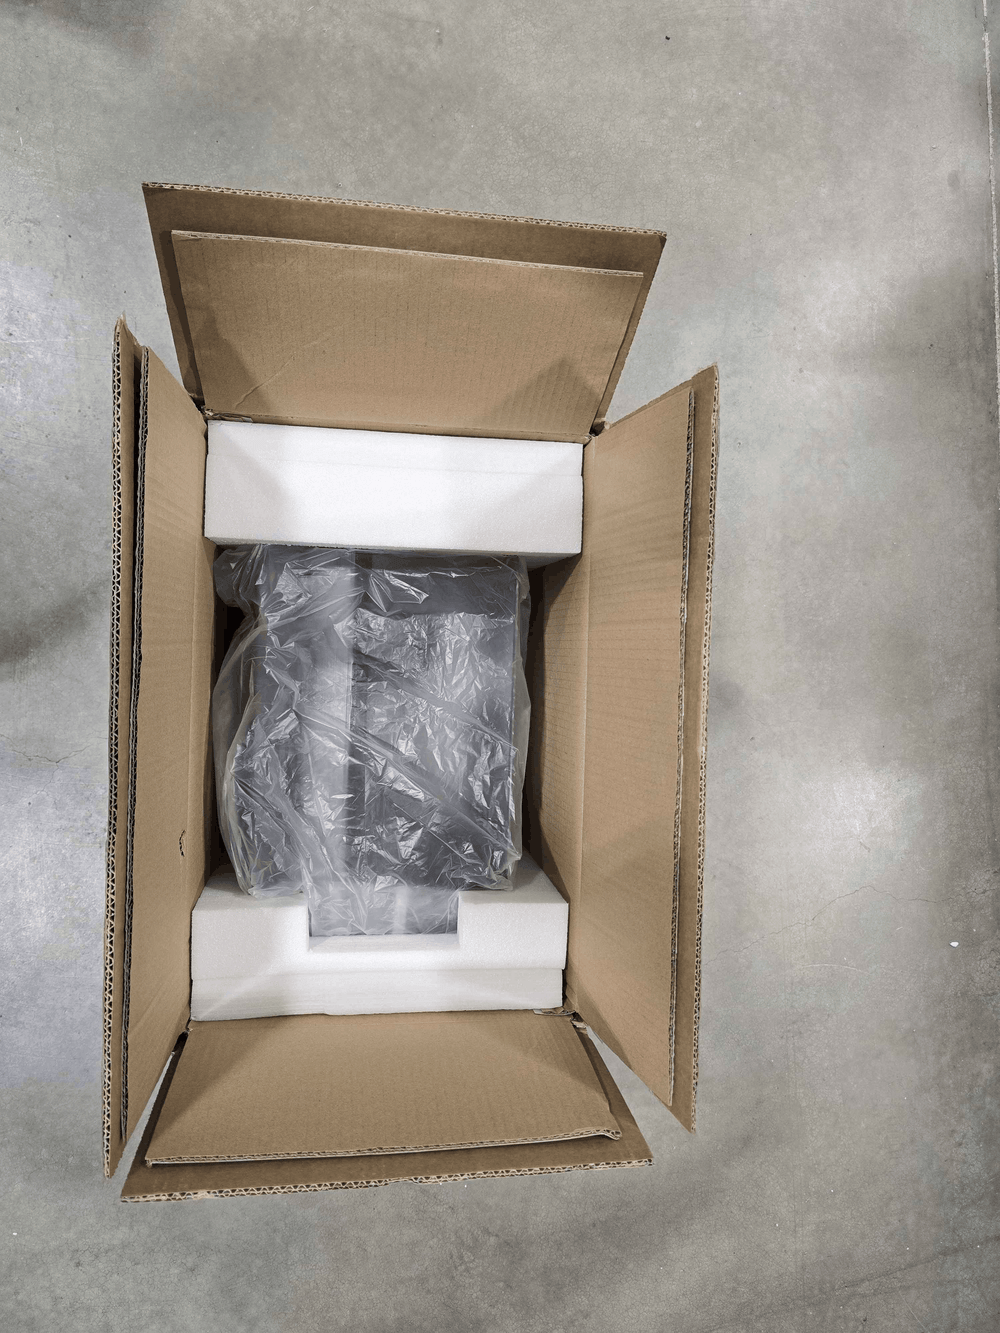
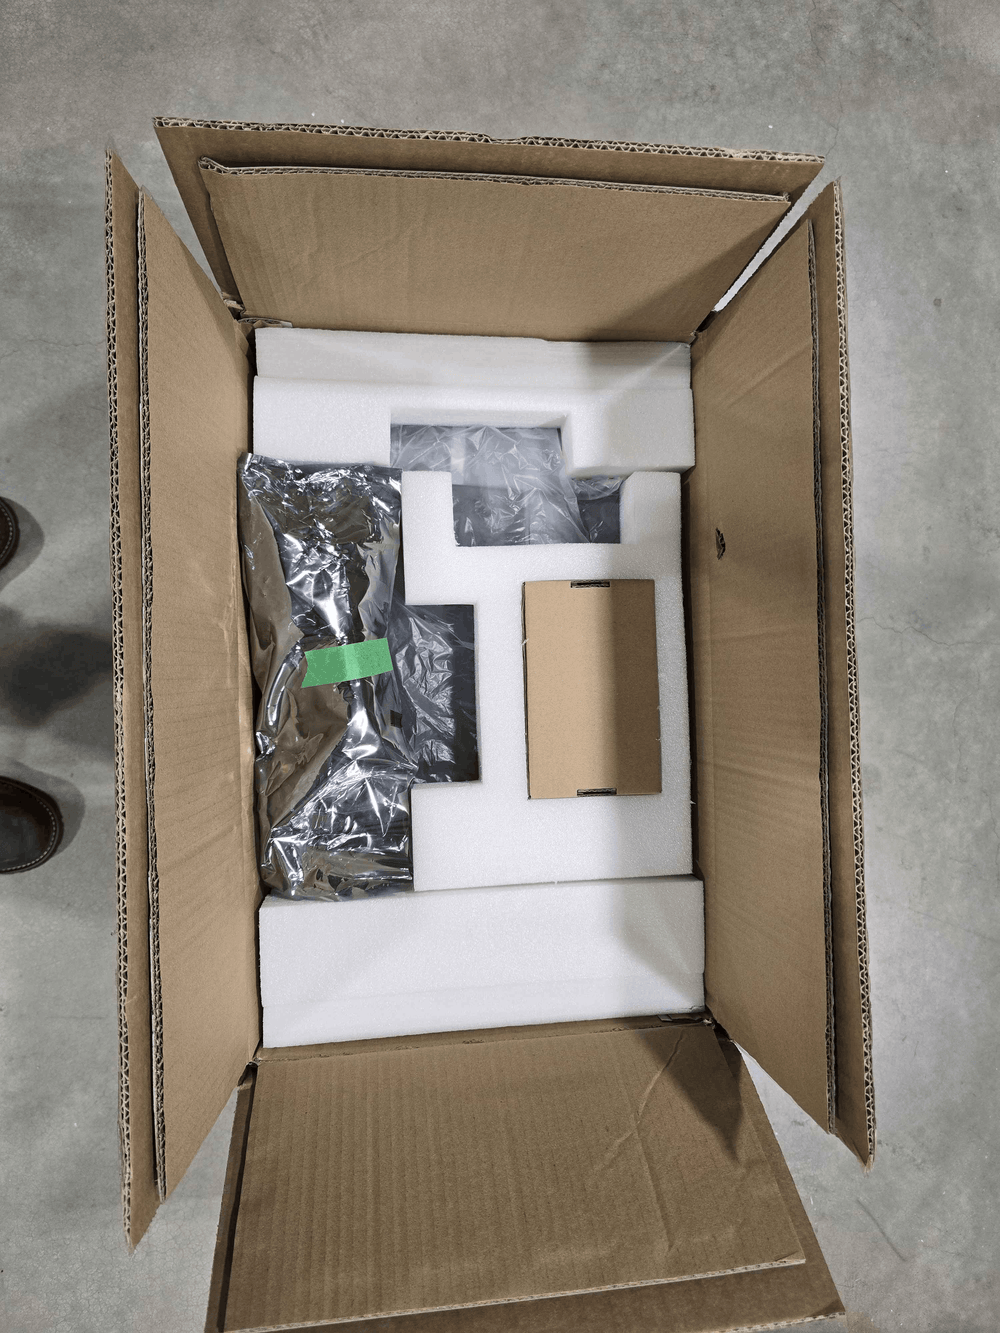
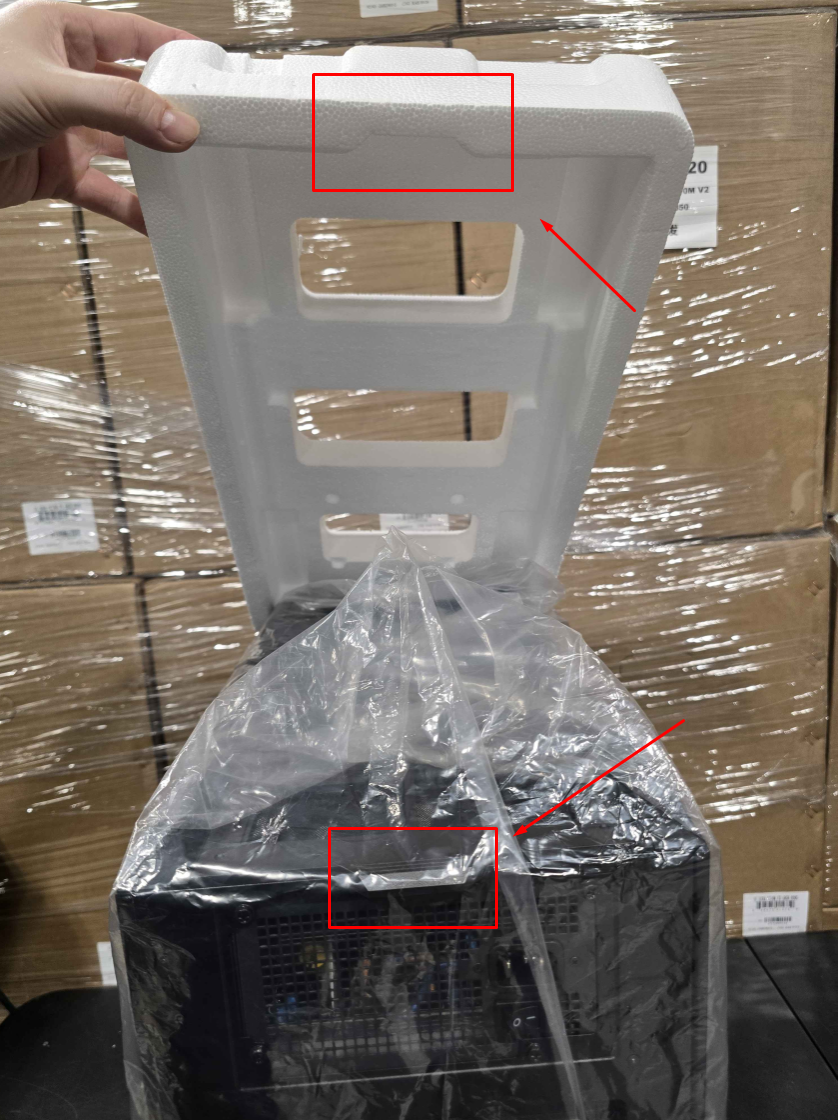
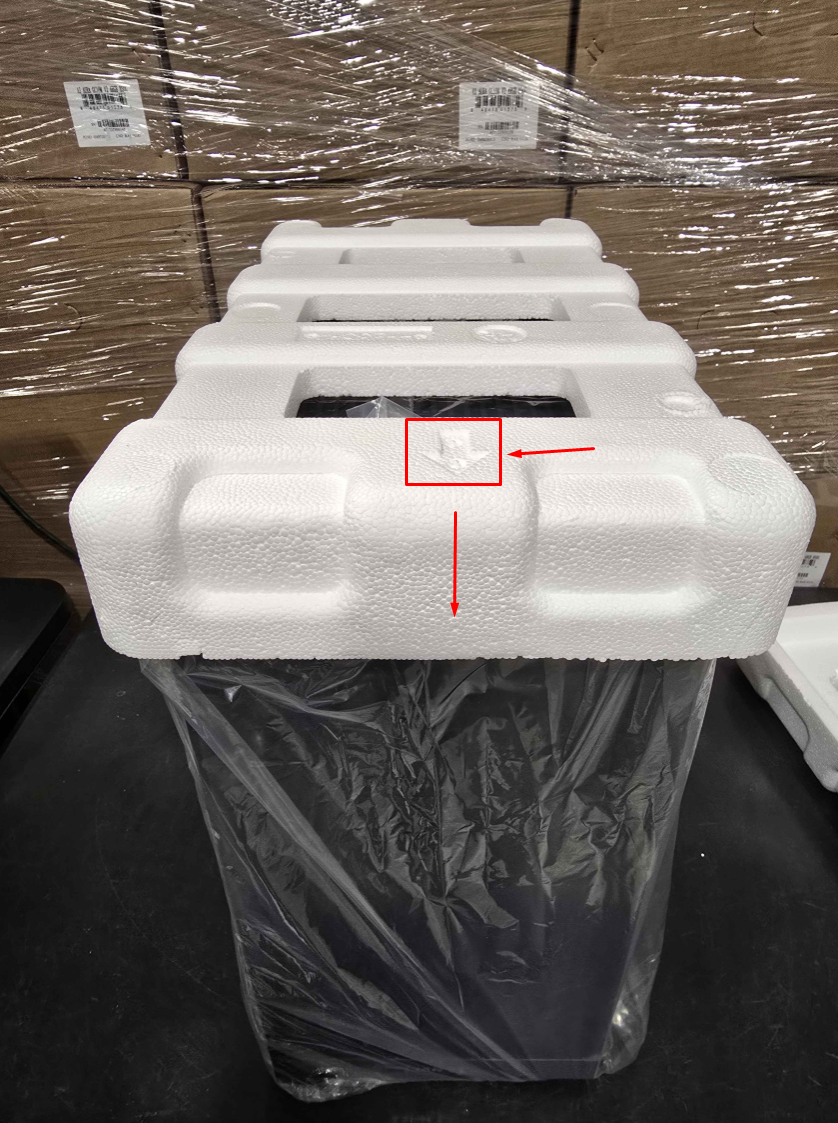
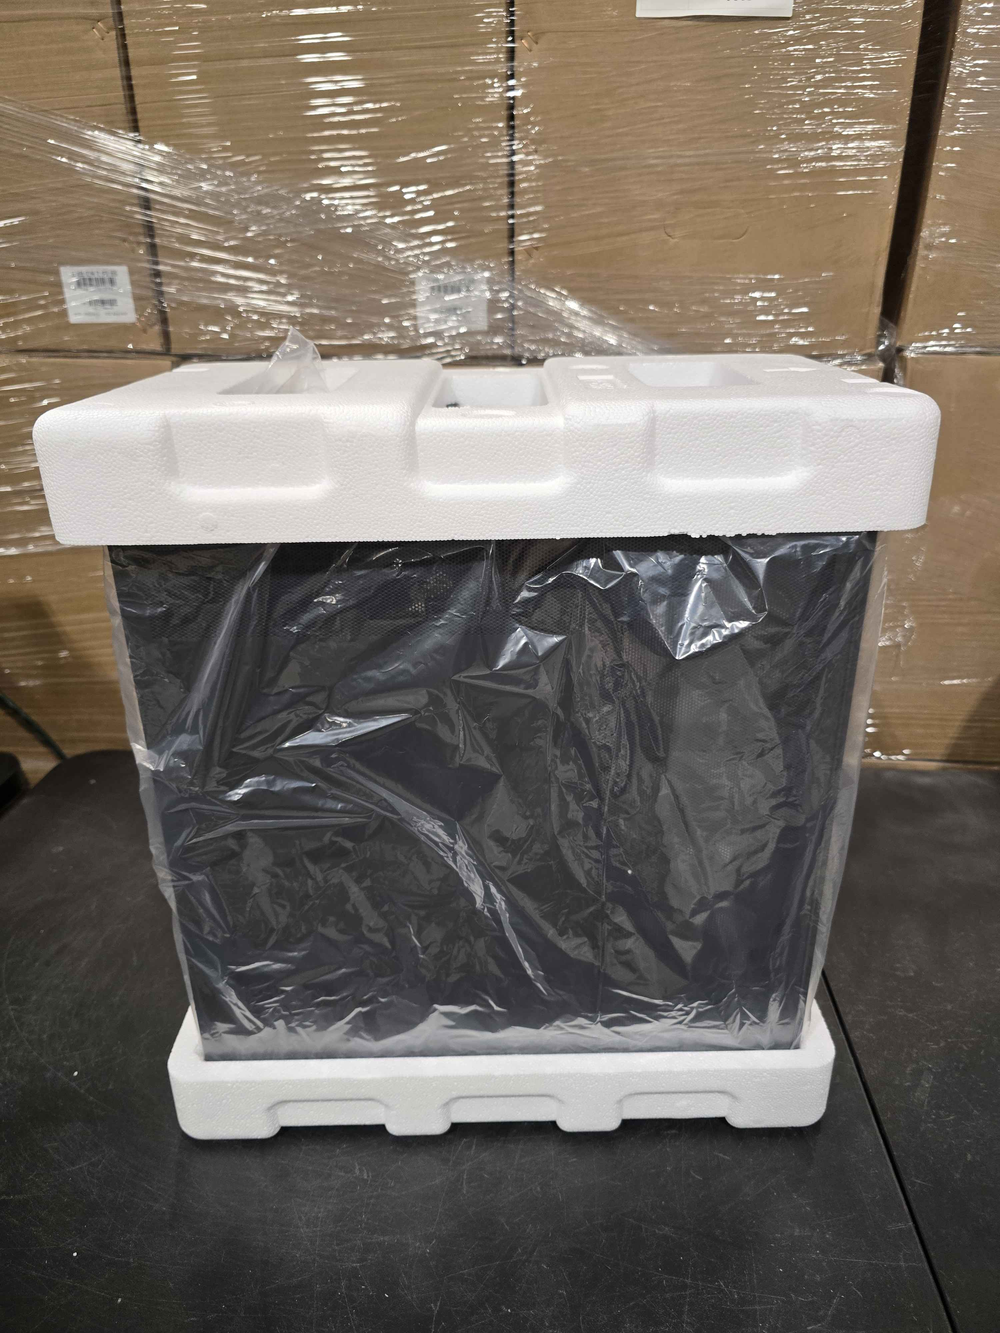
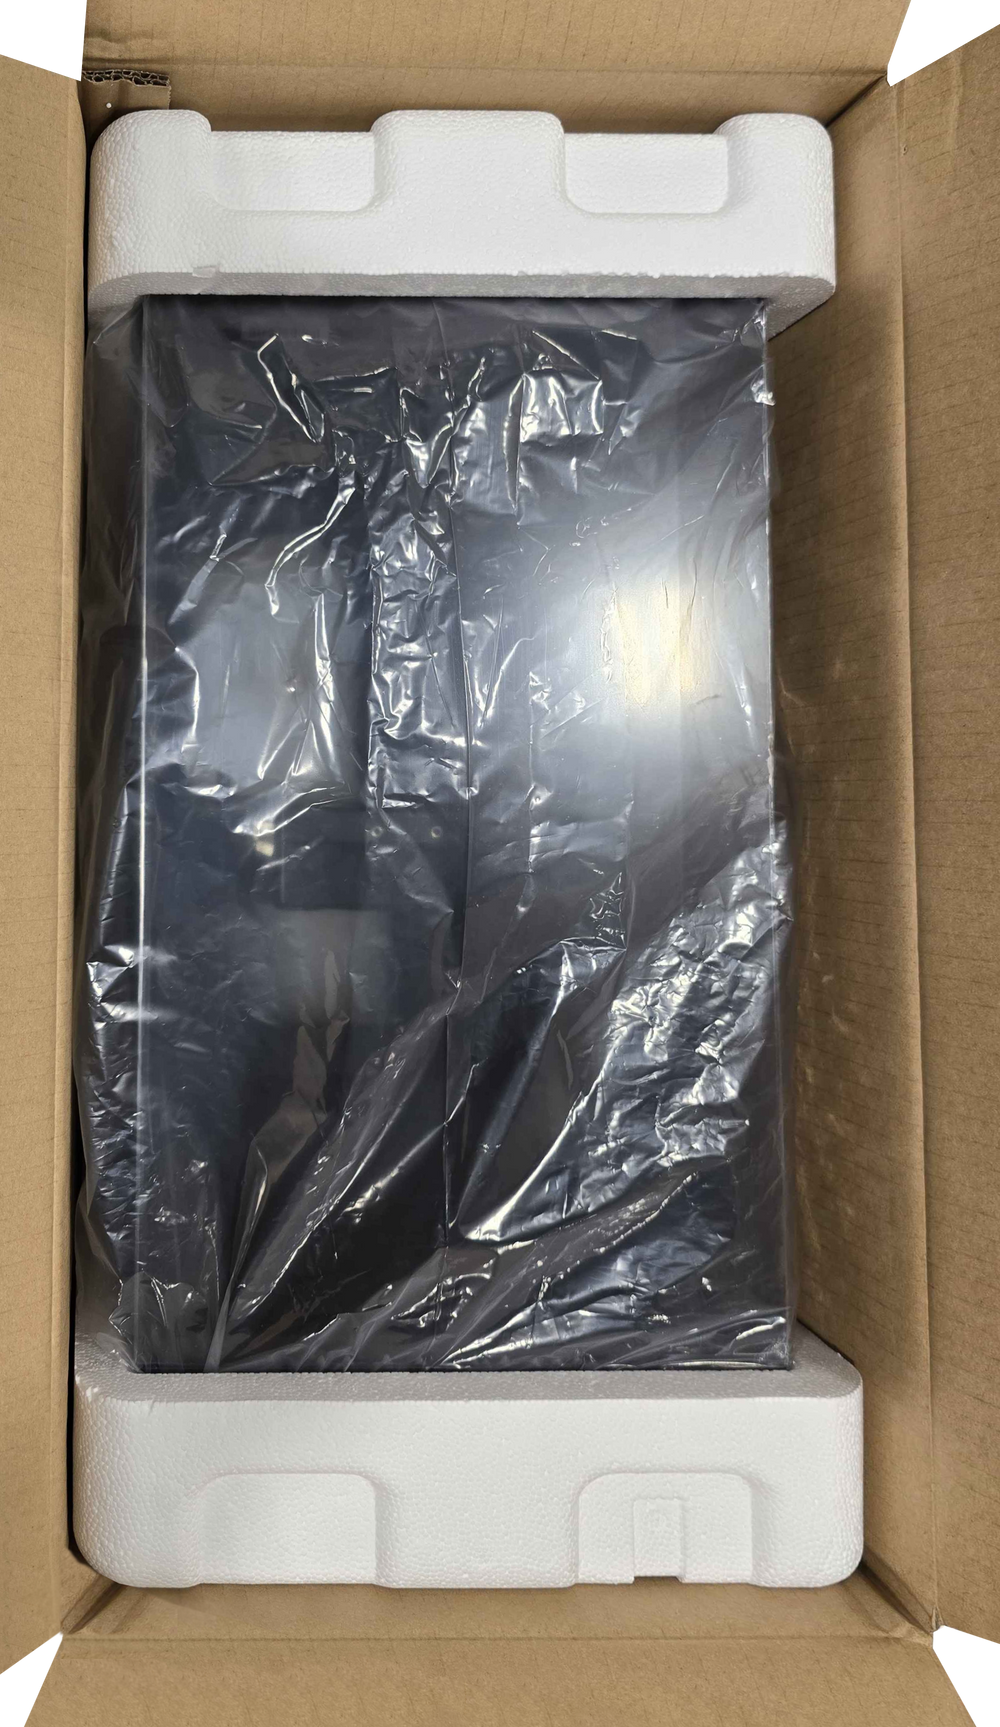
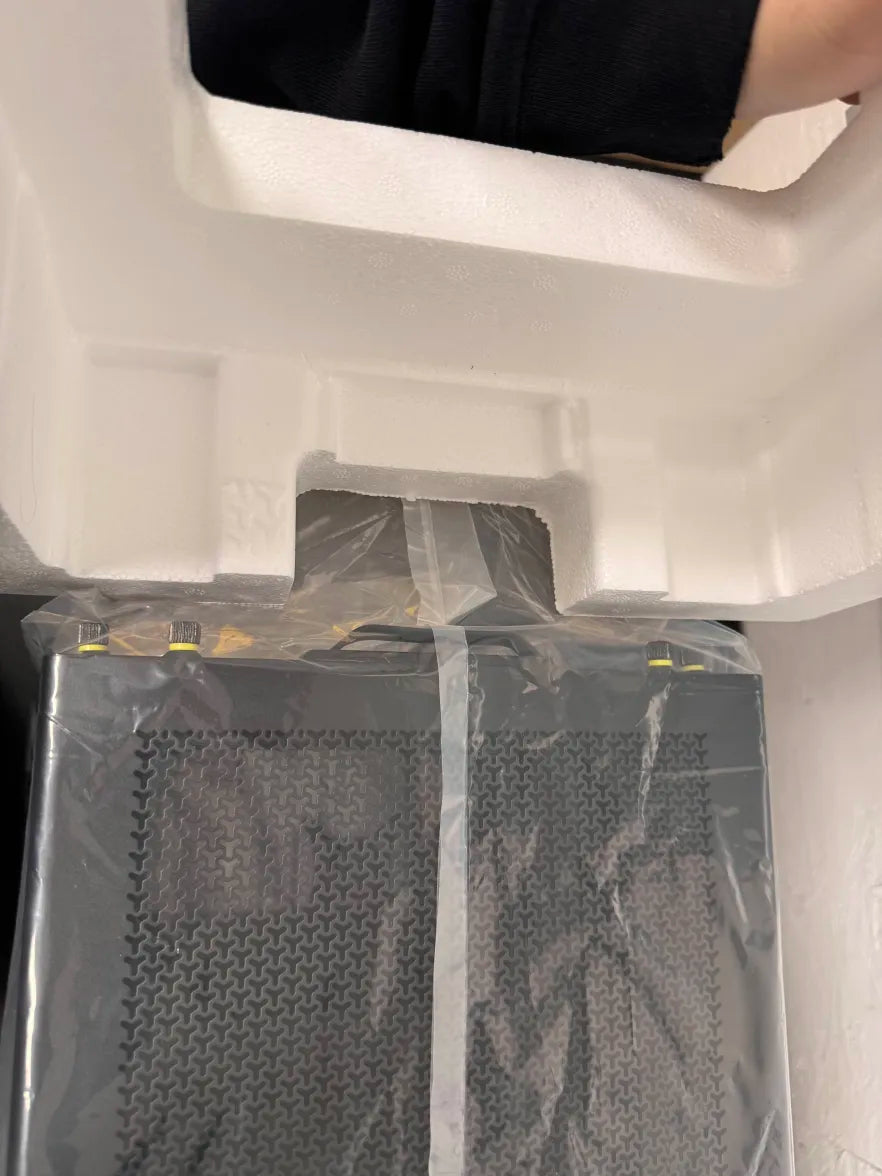
Now put the system back into its case box. The photos below are for your case specifically — follow them in order.
Tip: click any photo to enlarge it.
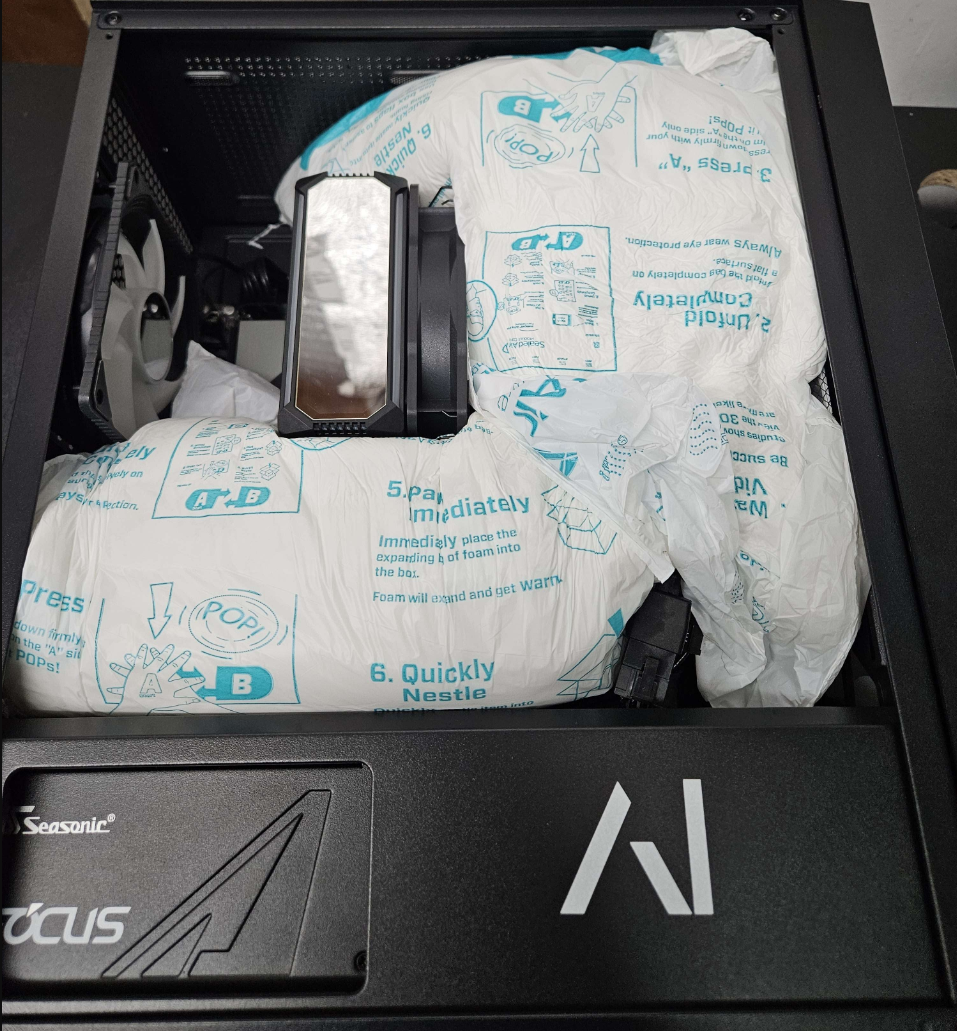
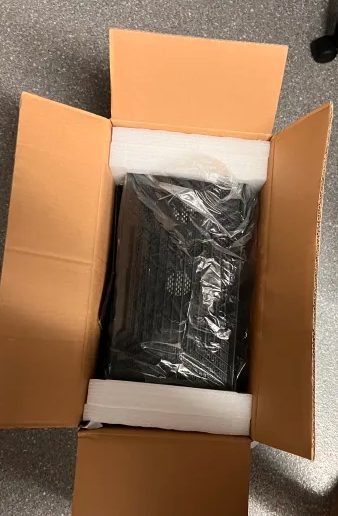
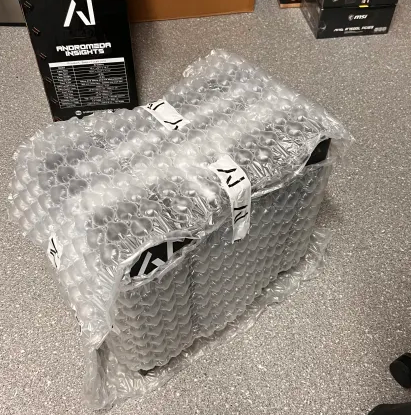
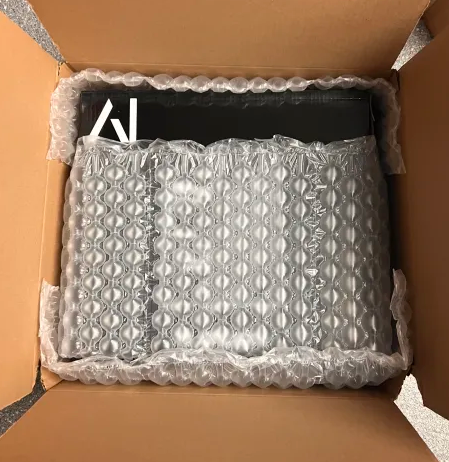
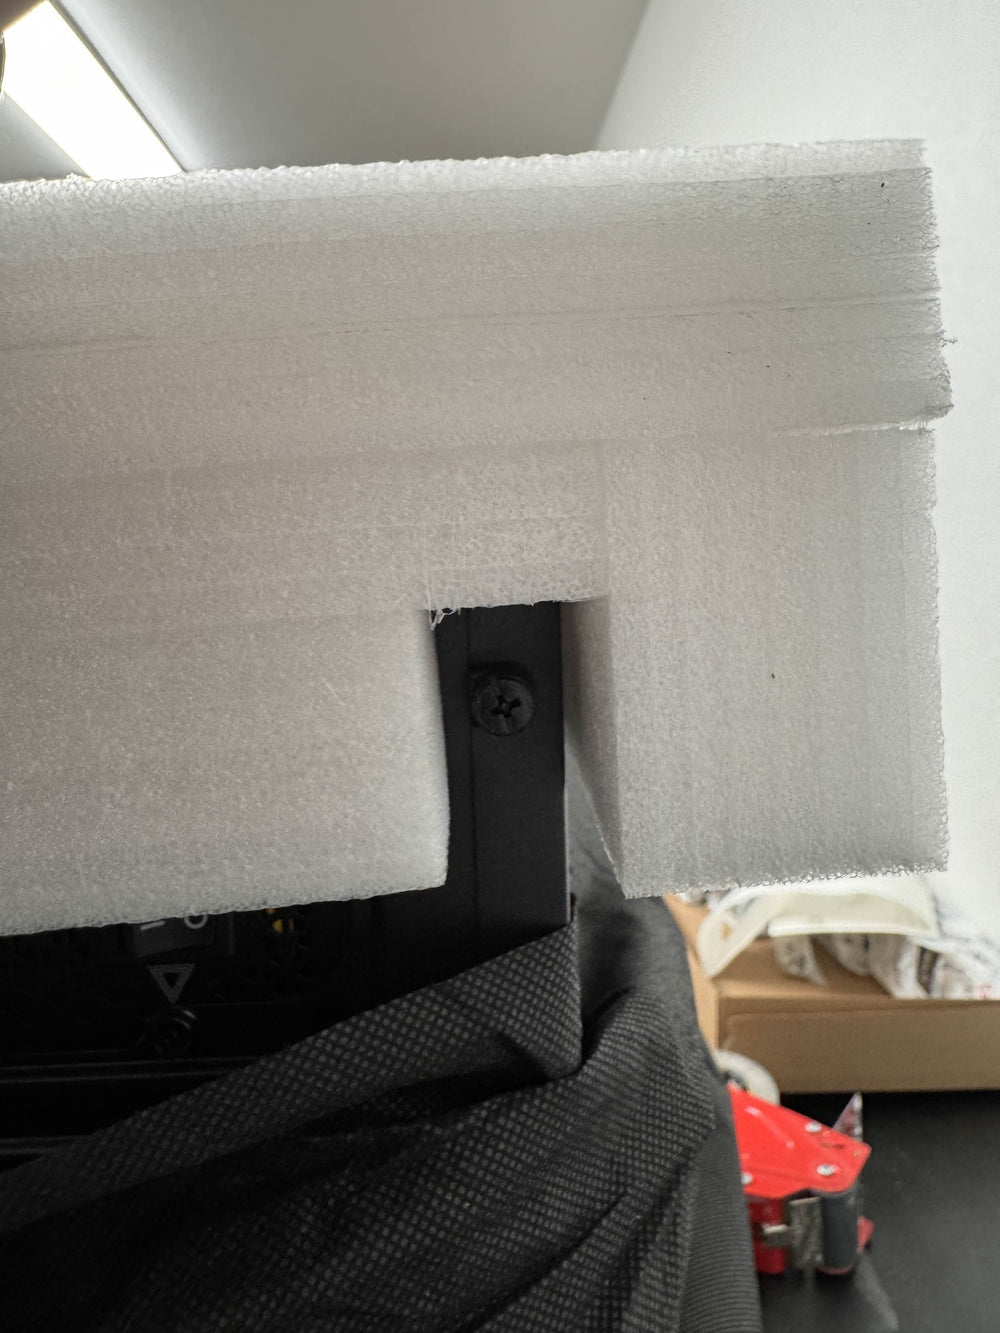
#1
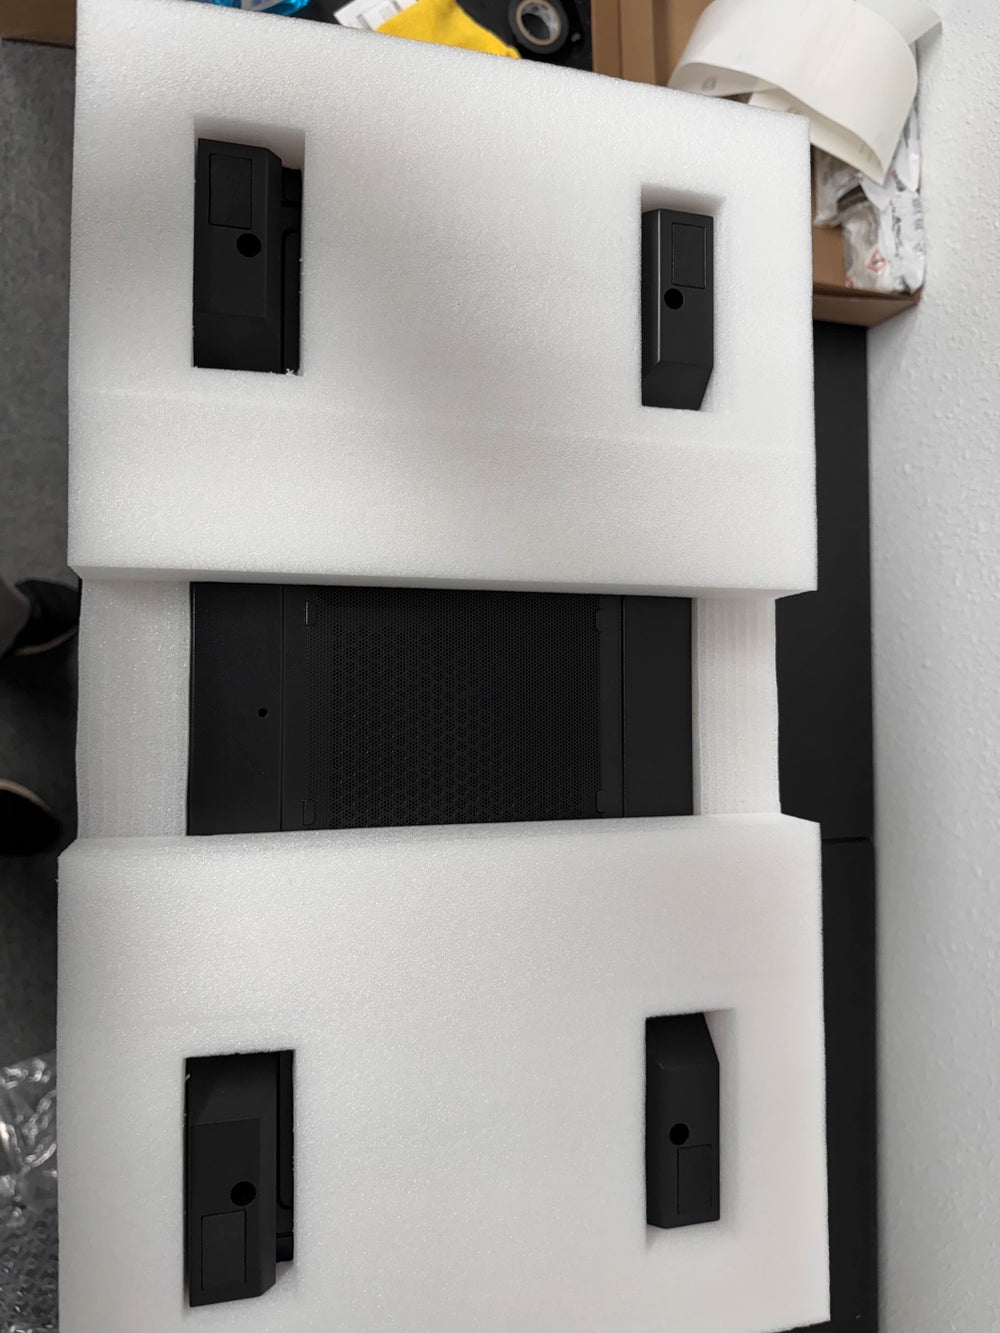
#2
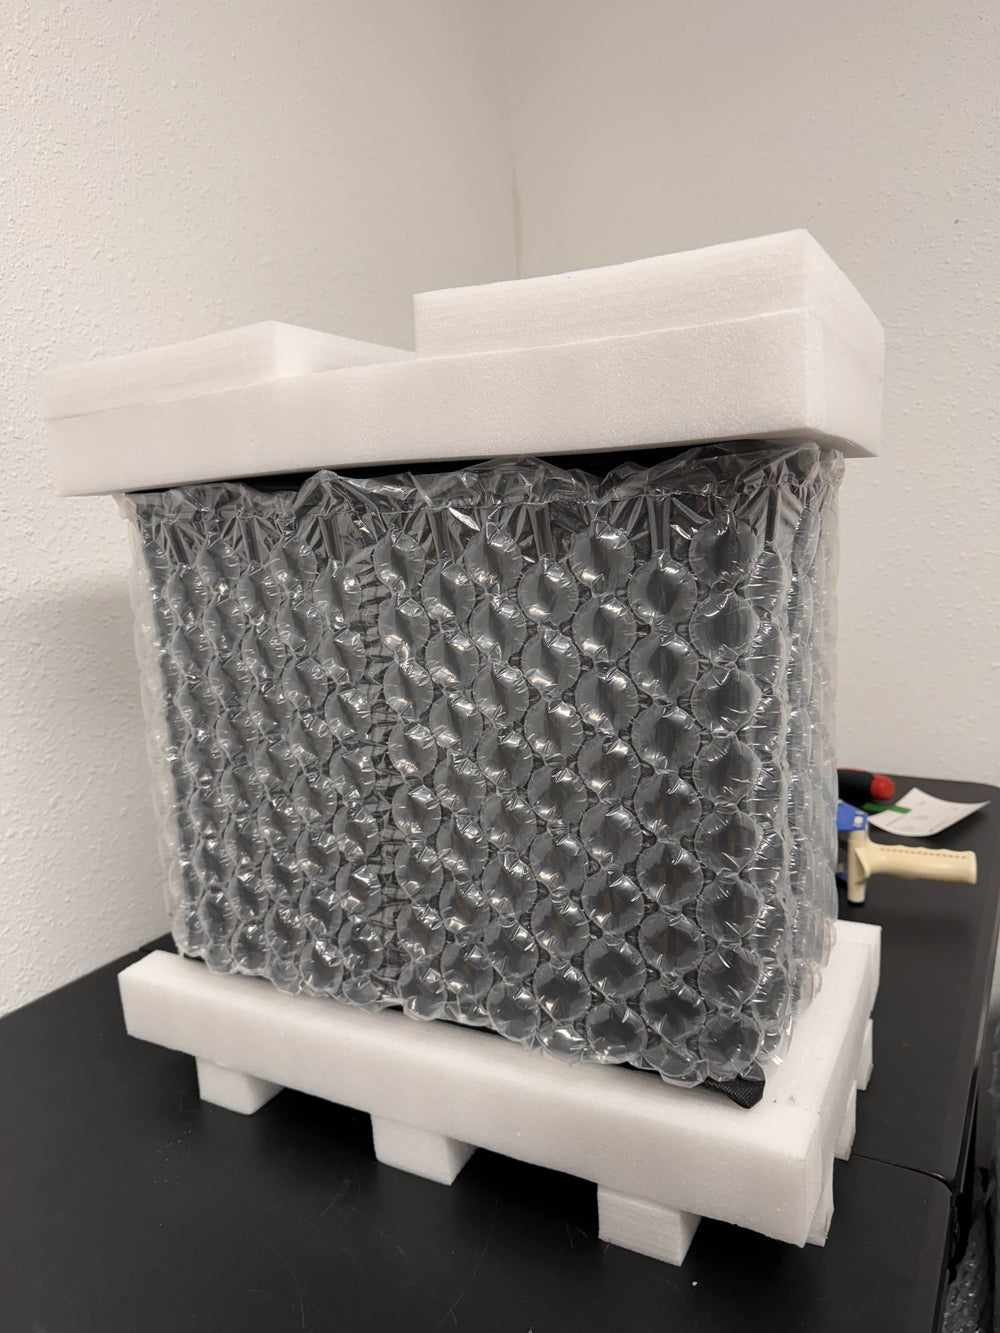
#3

#4
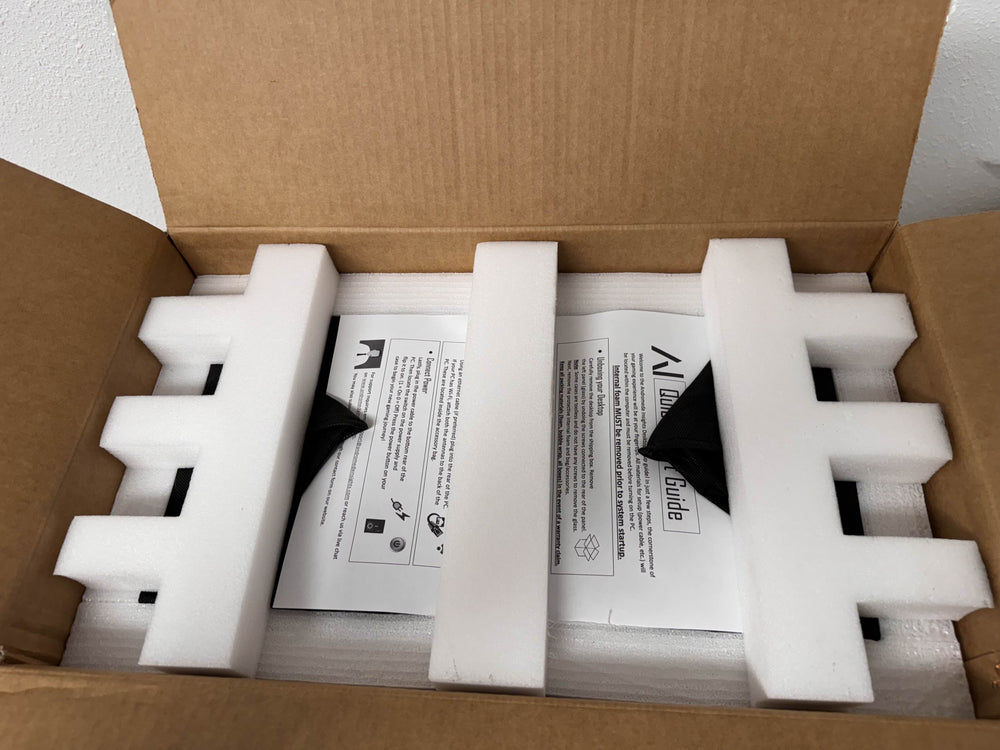
#5

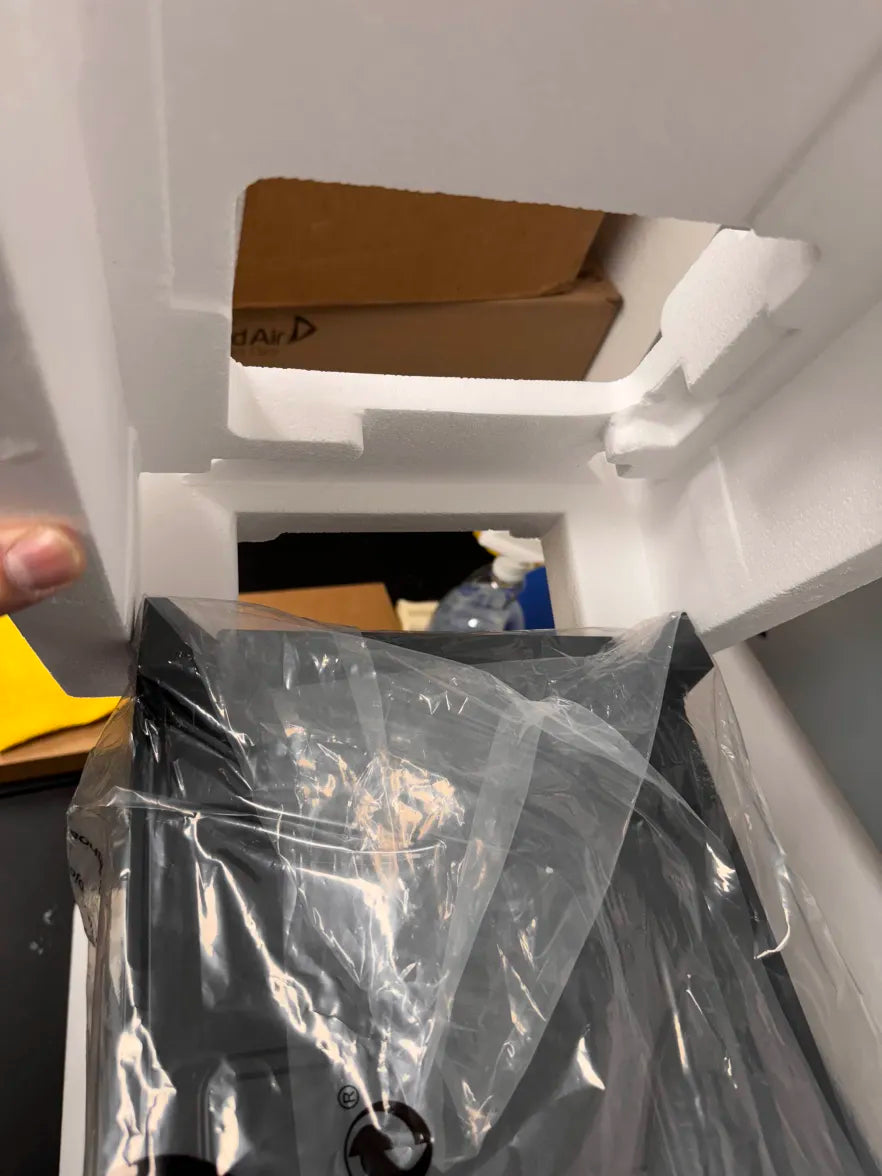
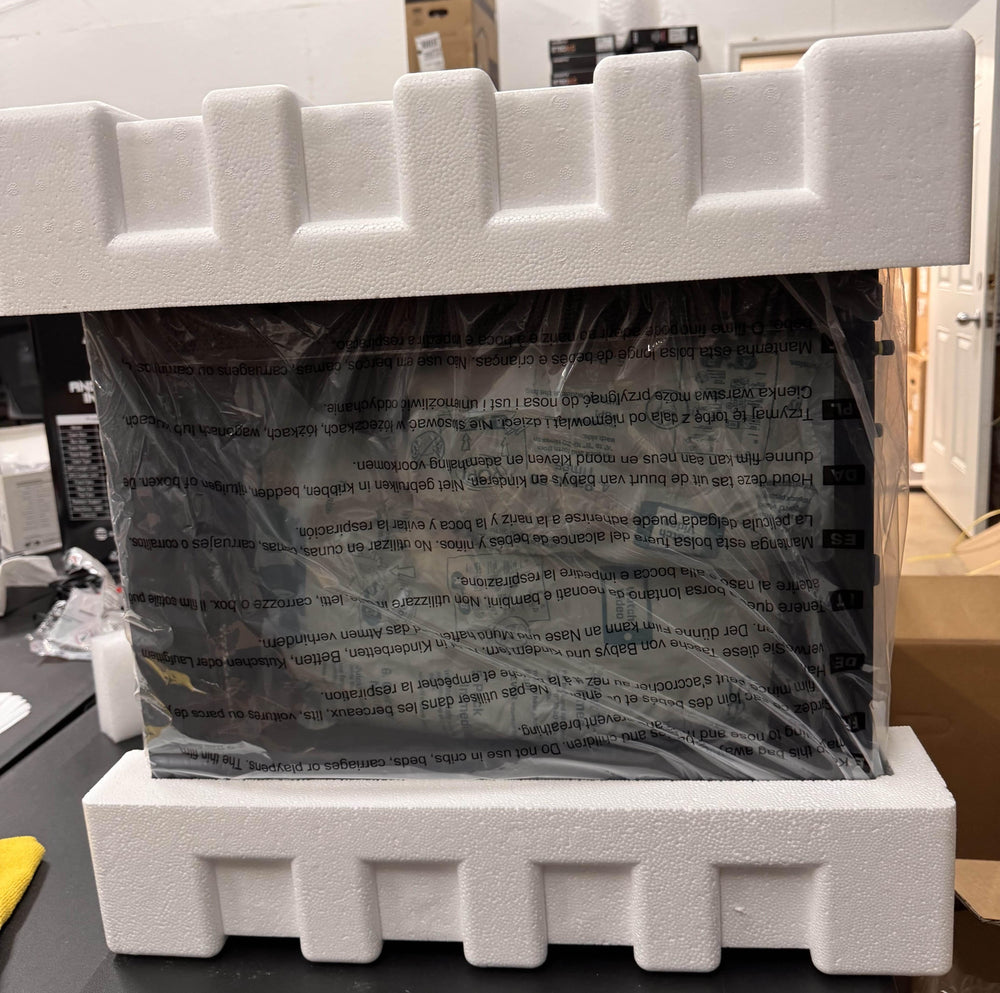
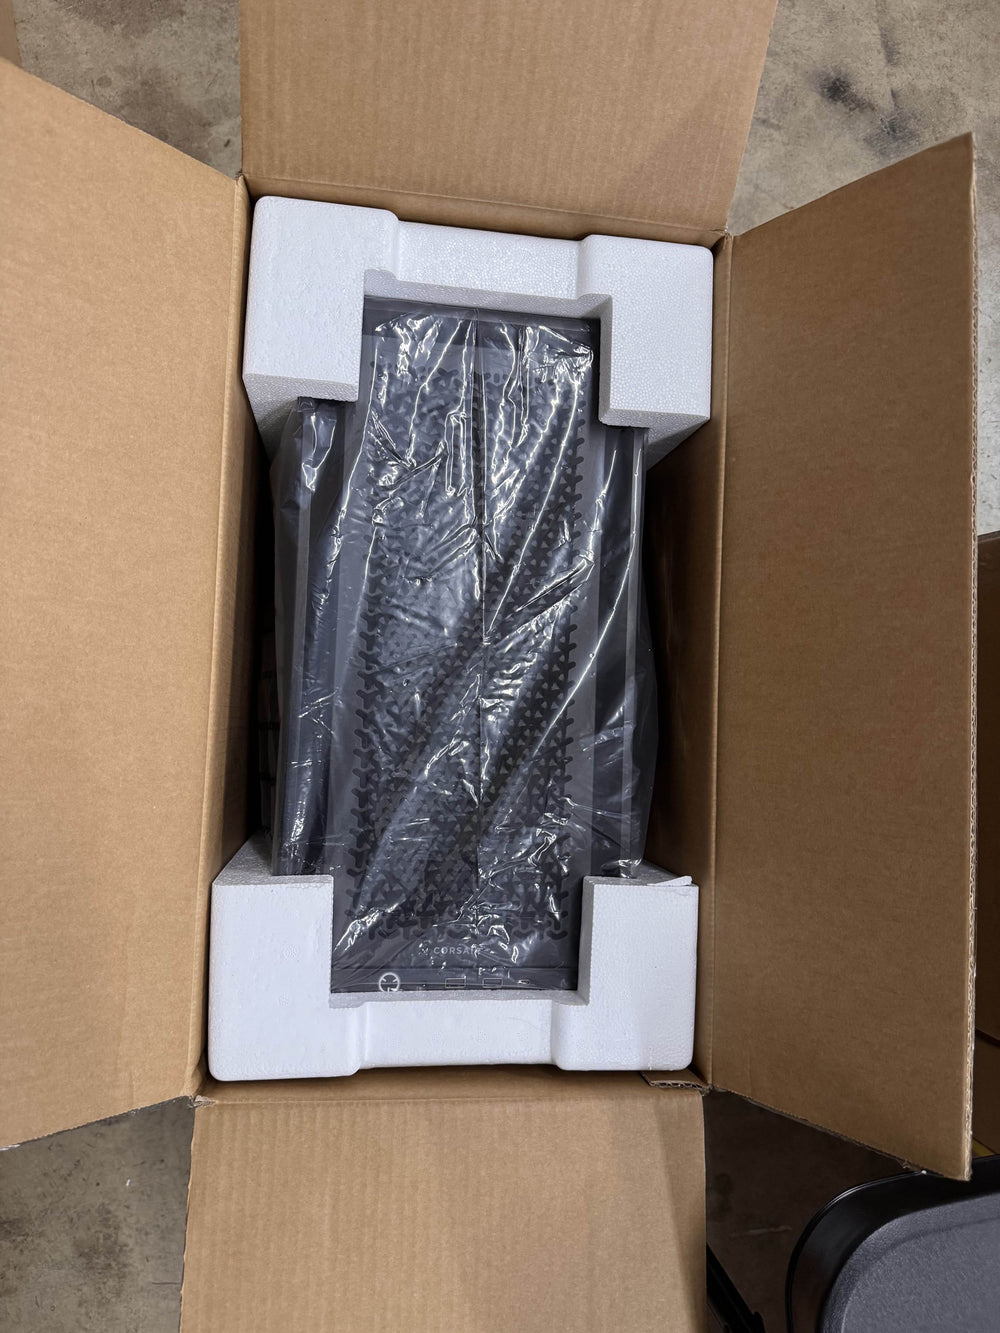
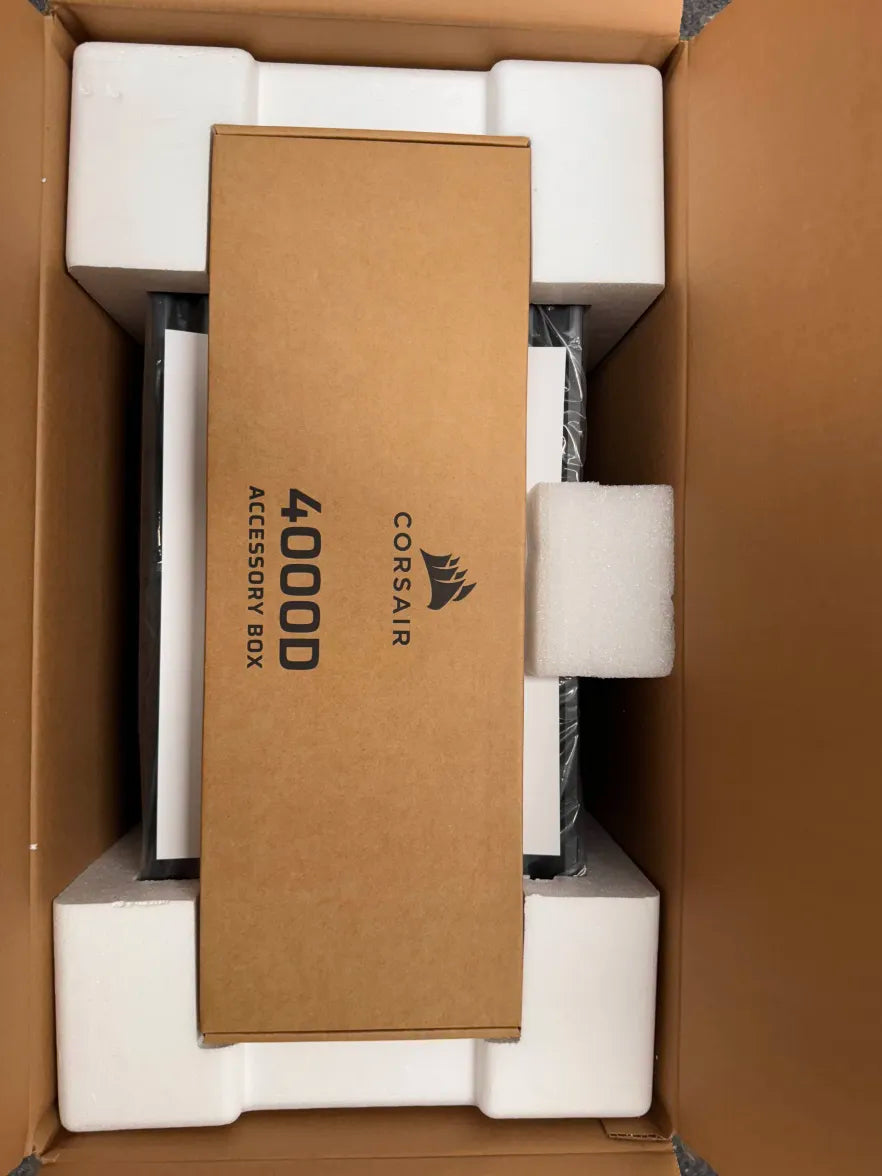
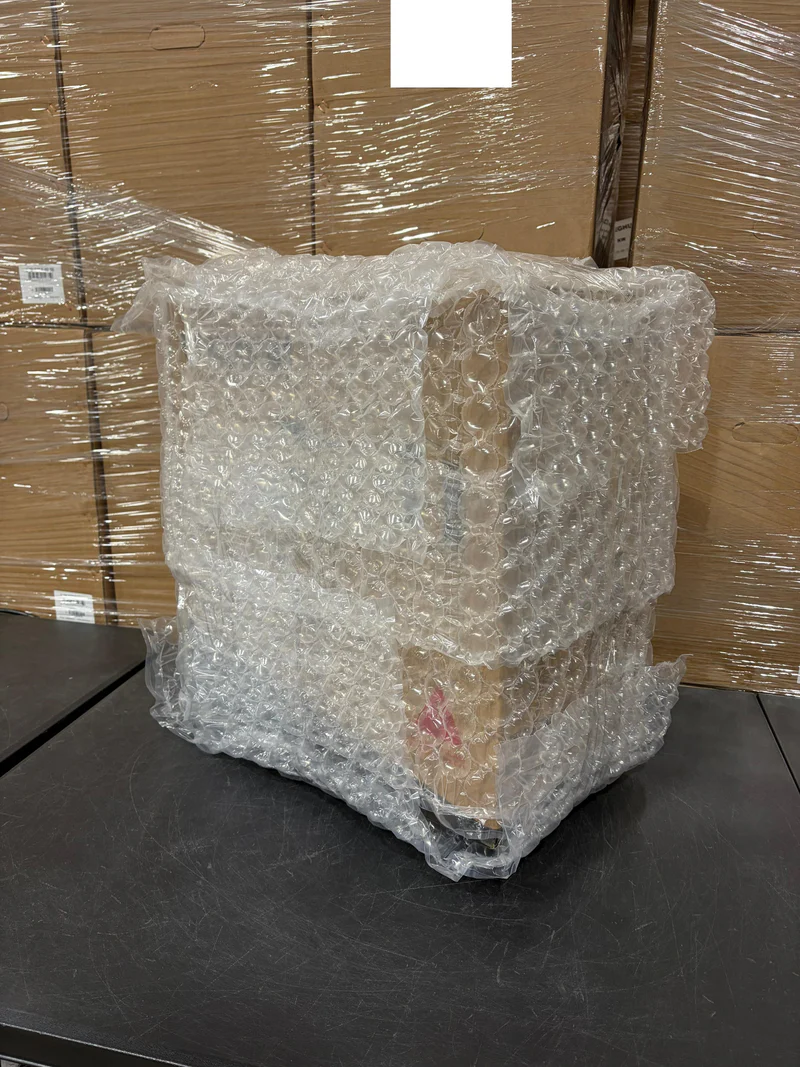
Wrap the PC in Bubble Wrap
Use bubble wrap: Wrap the entire PC ensuring all surfaces are covered.
Your case did not ship double boxed, so the bubble wrap is what protects the chassis from impacts against the outer box. Pay extra attention to the corners and to any glass panel.
Prepare Your Outer Shipping Box
Your system was not shipped double boxed, so you will need an outer shipping box.
- Choose a double-walled corrugated box for maximum protection (please reach out to our staff for recommended dimensions)
- Line the bottom of the box with additional foam padding or bubble wrap
- Create a "nest" for the PC to sit in
Reuse Your Original Outer Box
Your system shipped double boxed — the case box inside a larger outer shipping box. Please reuse both.
- Place the sealed case box inside the outer shipping box.
- Refit any corner blocks, foam spacers, or cardboard dividers that sat between the two boxes.
- The inner box should not slide around. Fill any gaps with packing material.
⚠️ If either box is damaged or missing, please contact us before shipping so we can advise on a replacement.
Place the PC in the Shipping Box
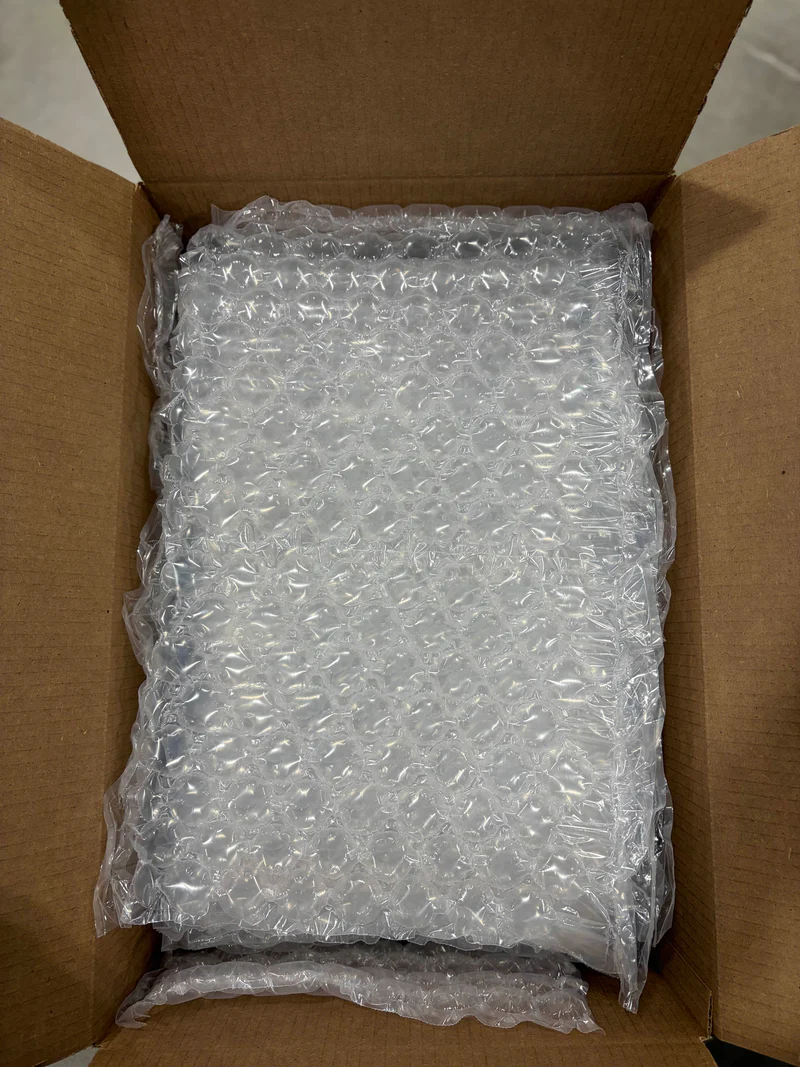
Carefully place your bubble-wrapped PC into the shipping box:
- Center the PC: Place the bubble-wrapped PC in the center of the box, ensuring it does not touch any sides of the box.
- Proper orientation: Ensure the PC is oriented upright (as it would normally sit) for optimal protection during transit.
- Fill gaps: Fill all gaps around the bubble-wrapped PC with additional bubble wrap, or foam padding to prevent movement.
- Extra protection: Add extra padding to corners and edges for maximum protection against impacts during shipping.
- No movement: The PC should be snugly fit with padding - it should not be able to shift or move within the box.
Final Check Before Sealing
With the case box sealed and seated inside the outer box, do a final check before taping it up:
- Upright: The system should sit the same way up as it did when it arrived.
- No movement: Give the outer box a gentle shake. If you can hear or feel the inner box shifting, add packing material until it stops.
- No pressure on the glass: Nothing should be pressing against the side panel.
Seal and Label
Complete the packaging:
- Add a final layer of padding on top (2-3 inches minimum)
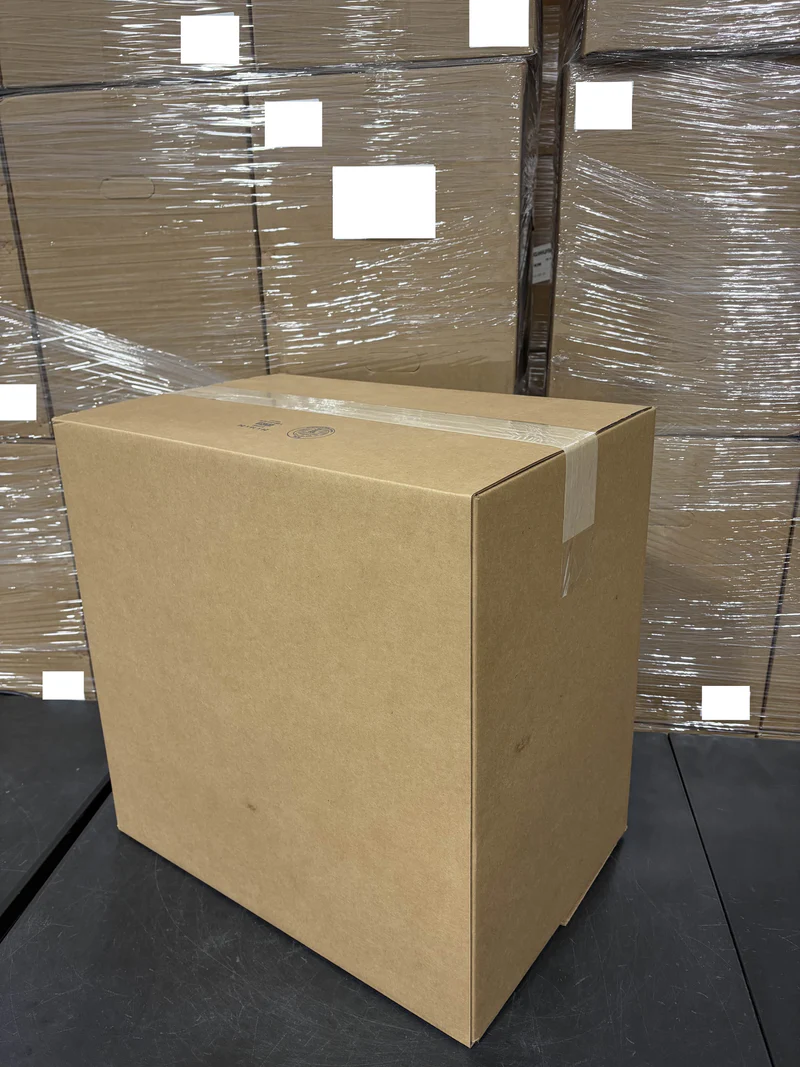
- Close the box and seal all seams with strong packing tape
- Apply strong tape across the top and bottom of the box for extra security
- Affix the shipping label clearly on the top of the box
- Include all required shipping documentation
⚠️ Warning:
Improperly packaged items may be refused or result in additional damage during shipping. Andromeda Insights is not responsible for damage caused by inadequate packaging. If you're unsure about any step, please contact our support team before shipping.